Hello friends, thanks for stopping, my card today I am show casing the stamp from Stampendous Stamps House Mouse called-Mixed Up. I used Bo Bunny pattern paper, copic markers, pearls, and an older Stampendous Stamp. I popped up my stamp using some craft foam. I hope you get a chance to check out the cards here at One Crazy Stamper and enter your creation, share the love with the design team. Stop by Lora's store and get some goodies as well. Thanks again for stopping. Happy Crafting.
Showing posts with label (Stampendous). Show all posts
Monday, February 15, 2016
Happy Birthday Friend
Hello friends, thanks for stopping, my card today I am show casing the stamp from Stampendous Stamps House Mouse called-Mixed Up. I used Bo Bunny pattern paper, copic markers, pearls, and an older Stampendous Stamp. I popped up my stamp using some craft foam. I hope you get a chance to check out the cards here at One Crazy Stamper and enter your creation, share the love with the design team. Stop by Lora's store and get some goodies as well. Thanks again for stopping. Happy Crafting.
Monday, February 8, 2016
You
Hello friends, and welcome back. For my card today I am using a stamp from Stampendous Stamps called - House Mouse Making Prints. I had so much fun with this little fellow, I stamped twice and fussy cutting around the image and popping him up with some foam tape. Colored my stamp using Copic Markers-E43, 41, 47,93, W4, 6. I used a few dies and added some Your Next Stamp Gumdrops. I hope you get over to OCS and check out the other design teams creations and stop by Lora's store and replenish your supplies. Till next time happy crafting.

Monday, April 14, 2014
Stampendous Gruffies - Cake Dreamer
Thanks for stopping by, this month our challenge is Anything Goes and would love for you to play along with the design team.
We are show casing a variety of stamp companies this month and today, mine little friend is from the stamp company Stampendous and I just love this little mouse, isn't he so cute. I know I am giddy about him. Anyway, play along with the challenge, take a peak in Lora's store for some great sales, and stock up on all your supplies needs.
Till next time Happy Crafting, and lets have some fun.
Supplies~Stamp-Stampendous, Copic Markers, Xpressit Copic Cardstock, Border Punch, Rhinestones, Little Darlings Pattern Paper, Ribbon.
Saturday, March 29, 2014
How To Do Shabby Chic Tutorial
Hello Crafty peeps! I'm sure some if not all of you love and have seen these shabby chic styled cards and wondered how they do it. Because I know I did, so today I'm going to show you how.
My idea of shabby chic is a vintage, girly and distressed look. Most of all it has to be over the top embellished with lace, jewels, pearls, butterflies, flowers and lots of pretty stuff. A little curled up corner with some tears here and there will also do the trick. I will be using a few key products that really help add to the over all shabby chic look. Go grab a cup of tea and enjoy!
Here is my card!
Below is the How To Do Shabby Chic
As always I start off with a selection of design papers and my coloured image.
cheesecloth can be found at most grocery stores, it is great for crafting and making soups too!
After cutting a square of cheesecloth, it needs to be manipulated. To achieve this look pull and stretch the cloth in all directions, then gently fray the loose strings along the edges. Pictured top is a cut a 3x3 square, on the bottom are two different shapes of cloth that were manipulated.
Same goes for the burlap, cut a piece and manipulate it by stretching and pulling to your liking.
A close up
These two products combined help put the shabby in the chic.
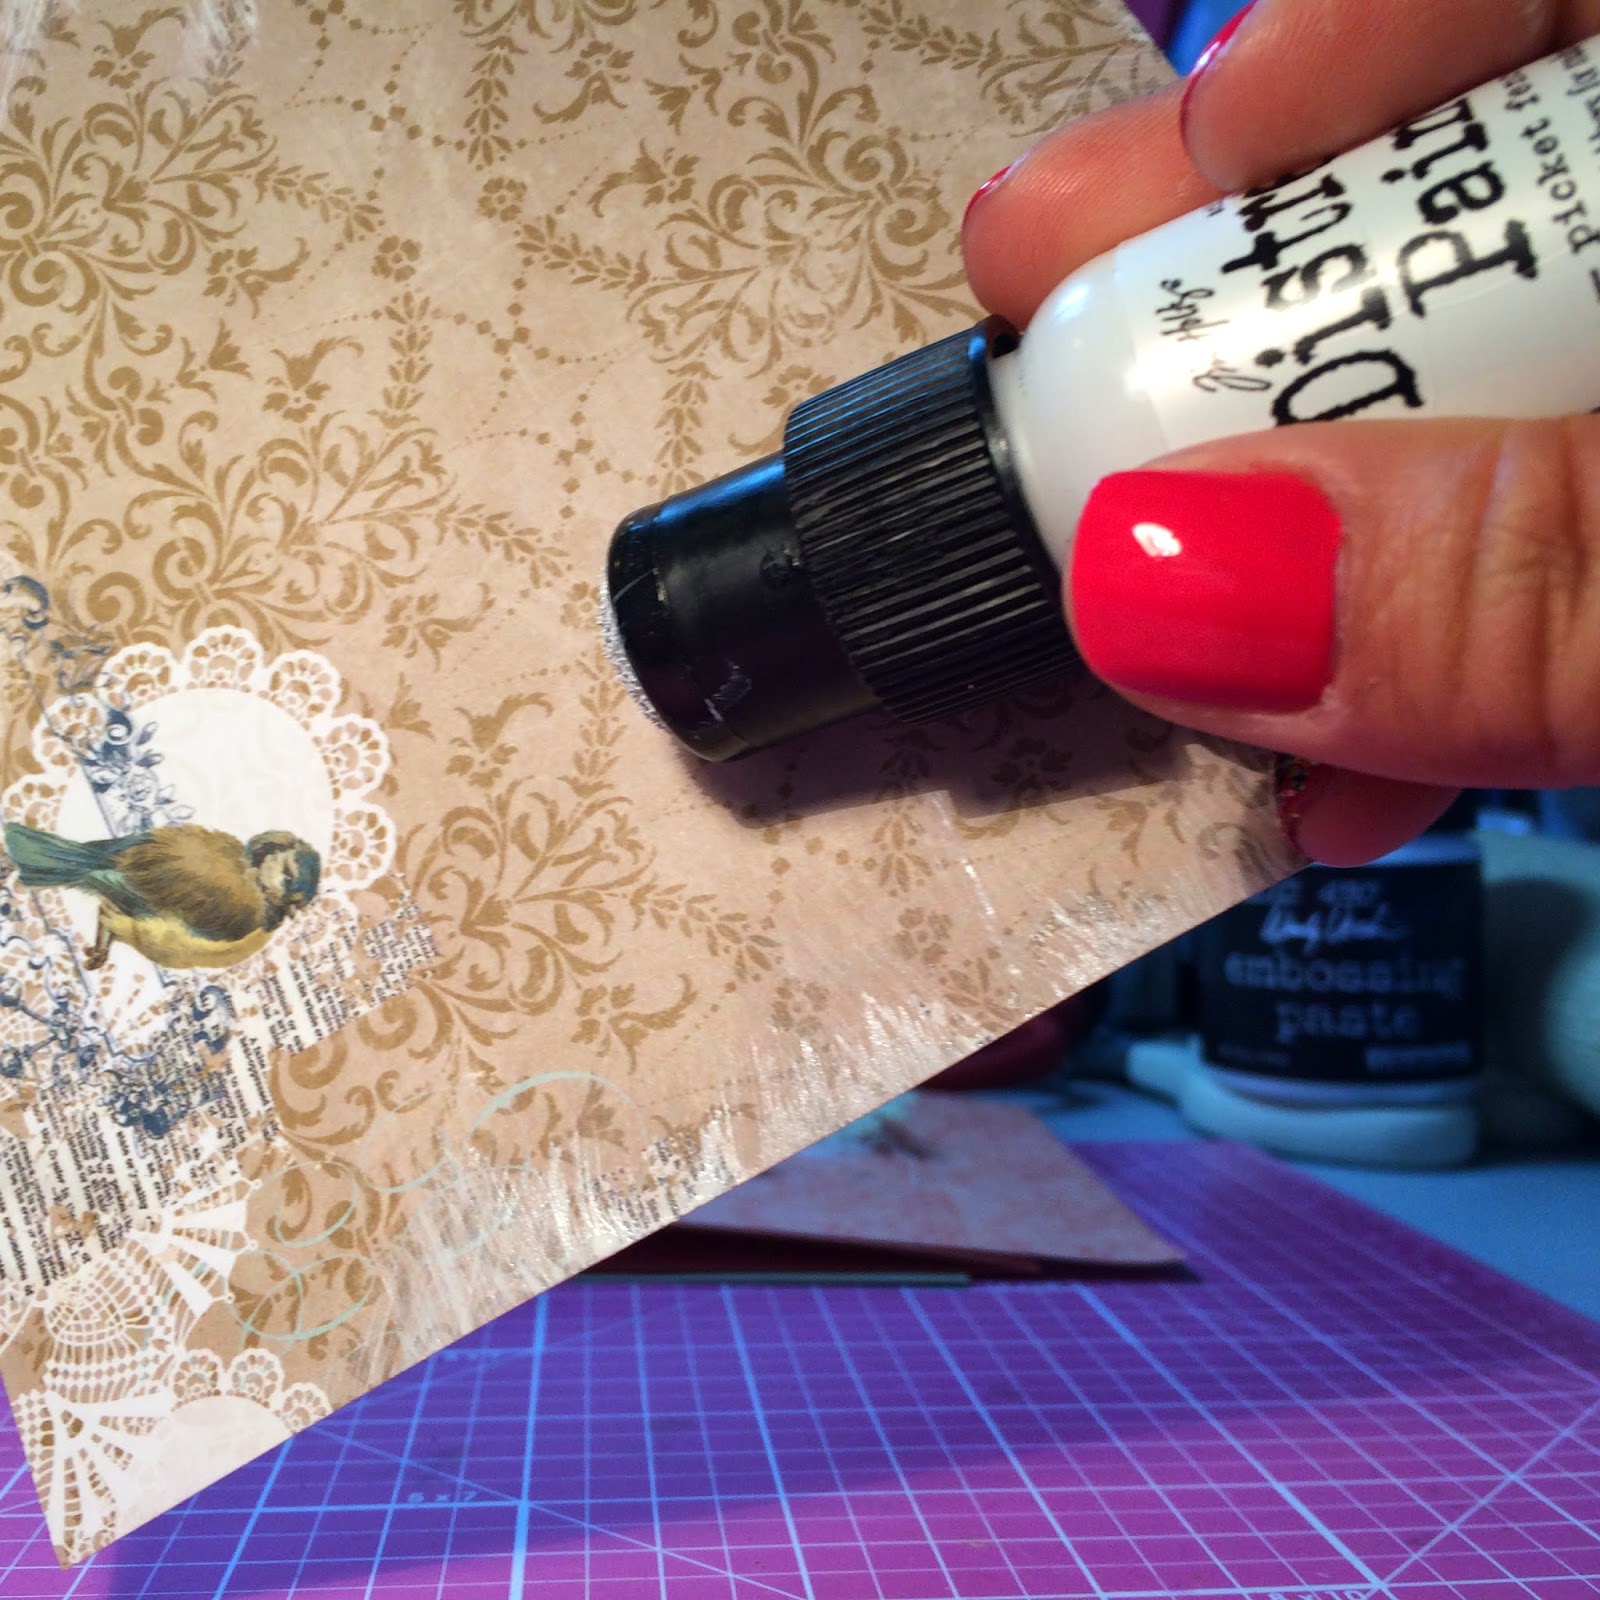
This distress paint has a dauber top applicator great for easy use and application. Along the edges paint it on starting from outer edge and feathering inward. Repeat until you are satisfied with the depth of paint colour and distressed look.
Finished look with distress paint.
Another super fun product to work with is the embossing paste, I've seen it used with stencilling but thought it would work good for a shabby chic look.
This paste is quite thick and gives a great 3D distressed effect. Using a sponge pouncer I applied the paste along the edges with a carefree approach.
Finished look, allow this step to dry.
This fun step involves embossing powder, embossing enamels, glitter and mica fragments.
I inked up the edges with versamark and covered it with a clear ultra thick embossing powder. The ultra thick embossing powder is an essential base to allow the mica fragments to have something to adhere to. (sticky embossing powder works too)
I sprinkled on a medley of embossing powders, glitter, fragments and mica.
Here is what they look like after being heat set. Always heat set from underneath or you will loose all your beautiful powders and fragments! (left is with embossing powders and fragments, right is just embossing powders.
Finally raid your stash for ribbons, lace, pearls, jewels, flowers and embellish until you cannot embellish no more!
Have a fabulous day!!
Supplies Used
Bella Sole Gifts of Love(Whimsy), Sponge Pouncer Mini(Tulip), Frantage Embossing Kit, (Stampendous), Frantage Mica Kit(Stampemdous), Studio 490 Embossing Paste-White(Stampers Anonymous), Tim Holtz Distress Paint-Picket Fence(Ranger)
Copic Markers
Subscribe to:
Posts (Atom)