Thanks friends for stopping to see my tutorial I am doing here for One Crazy Stamper. So here we go. Water Color Paper Background Tutorial
I used Distress Ink, Water, Water Color Paper, Versafine Ink, Stamps, Non-Stick Craft Mat, Water Pen/Brush.
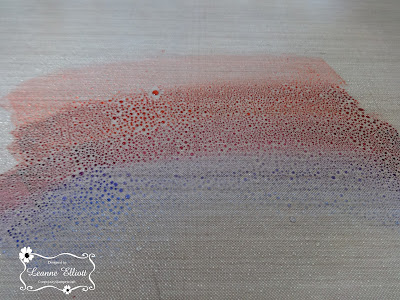
I took my small ink squares and wiped them across my craft mat in a random order, and then spritz water over top of the ink.
Took my Water Color Paper and smooshed it into the ink, and carefully lifted off and let it dry.
In this second one I did it the same, however I used my water pen/brush before it dried and swiped over the ink random like to make more color on the bottom.
The first one I added some grass, flower, and bird stamps, along with a sentiment, tried to keep it clean and simple so you can see the back ground better.
This last card, I added a bit more stamps, but you can still see the how the ink soaked into the paper and makes a unique background. I hope you liked my tutorial and I hope can try making your own backgrounds, water, ink, water color paper. Happy Crafting.
Supplies:
Water Color Paper, Water Bottle, Versafine Ink, Distressing Ink, Water Pen/Brush, Stamps, Non-Stick Craft Mat, Card Stock Base.


Gorgeous tutorial. Thanks to share it.
ReplyDeleteMarjeta
A great tutorial Leanne. Thank you for sharing.
ReplyDeleteGreat idea to do the background with a silhouette style of card - love this, Leanne!
ReplyDeleteThis is so effective - really clever background! Could you tell me which card/paper make you use please? Jx
ReplyDeleteJust touch the link in my supply list and you can go right to the paper I used. Prima water color paper. Thanks again!
Delete