
Welcome to Terrific Tuesday time here at One Crazy Stamper, and this month I get to show you all a great tutorial featuring a variety of items that can be purchased at the online store. When I first saw this tutorial late last year, the original instructions used the Outline Peel-off Stickers from any of the companies that now sell this item, but I wanted to try for the same look using several of the Memory Box dies that I have been collecting. The end result is stunning!!!
So gather your supplies -
Sookwang Scor Tape, Copic Xpress It cardstock, Glitter Ritz in any of the white or clear colors, Cardstock of your choice, Copics, Glitter Magnet, Tweezers, Cuttlebug, Metal Shim plate, paper trimmer, Memory Box dies, Art Institute Dries Clear Adhesive, Microbeads

Cut Scor Tape to the finished size of your card front ( 5 1/2" x 5 1/2" )

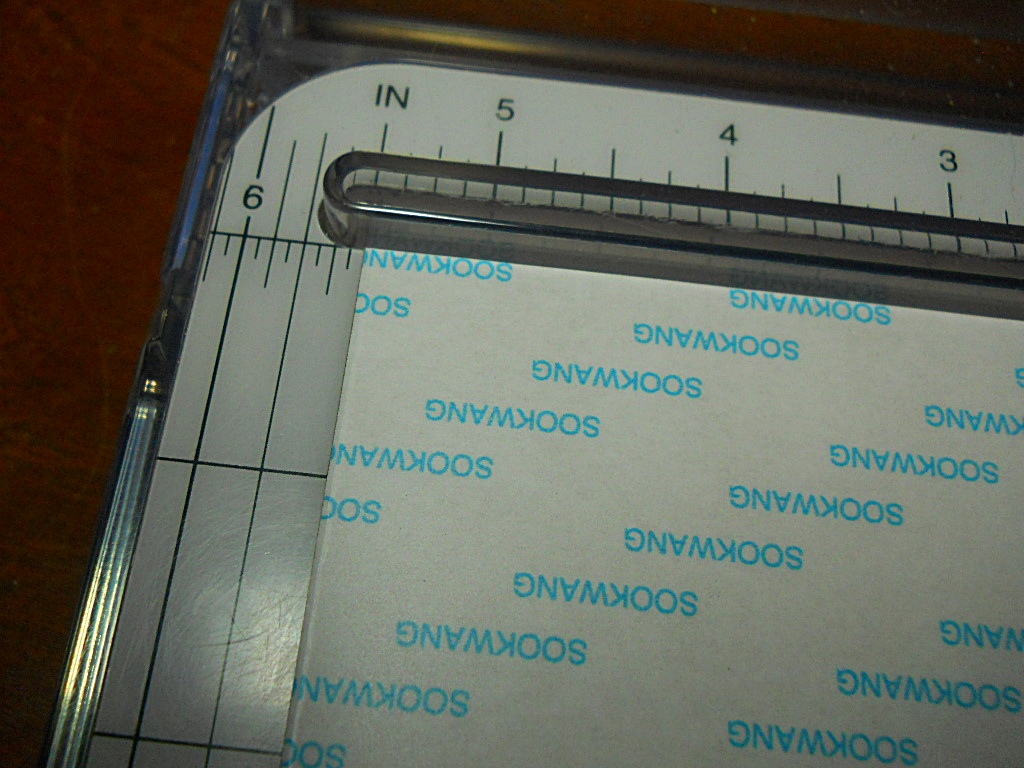
Cut Copic Xpress It cardstock to the same size as the Scor Tape.

Peel off backing paper from Scor Tape and adhere to the Copic Xpress It cardstock.

Cut your choice of Memory Box dies from cardstock.


Using tweezers carefully place die cuts on the exposed layer of the scor tape - be sure to not touch the surface of the tape as that will effect the adhesion of the glitter to the tape.


Once you have the dies placed on the sticky surface of the scor tape, you can then add the Glitter Ritz.

With your fingers, carefully burnish the glitter onto the card surface, shake off excess ...

... and remove any remaining glitter with the glitter magnet.

Now, for the fun!! Use your Copic markers to color your glittered images.

I have used the following on the Memory Box Wild Sunflower diecuts:
Yellow - Y13, Y15, Y17, Y38
Dark Yellow - YR21, YR23, YR24, YR27
Rusty Red - E07, E19, E18
Leaves - G21, G24, G28
Sky - BG01

Now, if you know me, you will know that I love to add more depth to card fronts, so out came my trusty Art Institute Dries Clear Adhesive and Microbeads to cover the flower centers.


Here's the finished card front in all of it's glittery finery!! The butterflies were done using some of the outline peel off stickers from my stash ( and now I will need to add some of the beautiful Memory Box butterfly dies to my collection ), and the sentiment is an oldie from My Sentiments Exactly!

The finished look of this technique is so different than if you first colored the images and then covered them with glitter - the colors are so much more vibrant!!
I hope you have enjoyed this tutorial, and that you want to try this stunning technique for yourself - you will be surprised at how easy this technique is to master!!

Wow, copic on glitter!!! Who would have thought! thanks for sharing. The effect is stunning.
ReplyDeletewhat a fun project! very artsy! love it Shari
ReplyDeleteThis is a great project. Love it Shari and will definitely be trying it.
ReplyDeleteWOW!!!!!! I'll definately be trying this one! It's absolutely gorgeous! microbeads in the center of the sunflowers?! Genius!! Thanks for sharing!
ReplyDelete