Friday, July 31, 2015

July Challenge Winner

Thanks for joining in our challenge this month. We had fun looking at all the fabulous entries!  We used random.org to choose the winner.

This month's winner will be sent 2 High Hopes Rubber and the winner is:

#37 DebiM. with her Sometimes Mojo is Hard to Find Card.


Debi please email me at sberkley51 at gmail dot com to claim your prize.

Check back tomorrow for our new monthly challenge and another chance to win!


Thursday, July 30, 2015

Beautiful

Thursday has arrived yet again, so it's time for me to show you all my project for this months challenge of Anything Goes at One Crazy Stamper.  Surprise I have chosen to do another card!


I have used the gorgeous image Blanche from Saturated Canary ( Little Darlings Stamps) that was stamped on Copic Xpress It cardstock with Memento Tuxedo Black ink, then colored with Copic sketch markers.
 
Card Recipe
Skin - E00, E01, E11
Dress/Eyes - B00, BG02, BG05
Lips - RV32, RV34
Hair - T4, T7, T10
 
The sentiment, ribbon, and paper ( Authentique ) are all from my stash.
 
Check the blog tomorrow to see who won this months challenge.


Wednesday, July 29, 2015

Its your Birthday, Maki a wish!


So sad, this will be my  last card this month to share using using Your Next Stamp's  Maki a Wish CYNS198 stamp set, Maki a Wish Die Set YNSD253.
I picked up  Your Next Stamps Mini Splatter stamp the last time I was into see Lora over at One Crazy Stamper. Inked it up and  stamped it in Tim Holtz Milled Lavender distress ink.  I also used YNS Hills die to complete the look of the card by adding some pattern papers and a designer shape at the bottom of the card.
The card was stitched, oriental papers added and various elements of sushi stamped and die cut. The birthday sentiment is from the same set and plays on the sushi theme for added fun!
 
Thank for peeking today. I'm going to miss playing with this stamp and die set, its been a fun month of Sushi for sure!

Coloured with Copic numbers C1,E33,Y0000,BV000,BV02,C00,E50,0,BV01,YG03,C2,R24,E31,E35,
YG11,BV00,C5, R20,E93,C3 & Sharpie White Marker


Thanks for peeking, have a crafty rest of the  week!
 

Special Wishes

Hi Fellow Crafters;

Hope you all are enjoying your summer so far.  I don't about you, but I do wish that the sunshine stays, it rains overnight and the humidity goes away.

For my last post of the month, I have used the Fuchsia Bouquet from Heartfelt Creations.


In the meantime, I have been staying inside with the air conditioning and playing with some new products; the Heidi Swapp Minc Foil Applicator Machine and the new Zig Color Clean Brush Markers.  These markers are watercolour and can be used with or without water.  Lora has the Zig Color Brush Markers Sets up as a Pre-Order here.

To use the Heidi Swapp Foil Applicator is fairly simple.  I cut the Delicate Oval die first using the transfer sheet as this will add the toner.  I then cut a piece of the Holographic Foil and put that over the cut.  This is then put the transfer folder, smoothed out and then put through the machine.
Supplies used:
There are still a couple of days to enter this month's challenge. Also check out the amazing Pre-Orders that Lora has up on the OCS store; as well all the other amazing products that she has.

Until next time keep cool and enjoy the long weekend that is coming up.

Hugs,


Tuesday, July 28, 2015

Birthday Balloons

Another hot and terrific Tuesday is here! For my card today I created a ballon bouquet attached bakers twine and tucked the ends into this super cute HH pocket stamp. I made this card for an awesome little 6 year old,  I think she loved it and I hope you do too.

Have a fabolous and day and keep on crafting!

Supplies
Wavy Balloon(High Hopes), Single Balloon(High Hopes), Happy Birthday Bold(High Hopes), Bumble Bear Pocket(High Hopes), Double Dot Think Pink Jewels(Bo Bunny), Diamondessence(Spellbinder), Summer Days6x6(Echo Park)

MOSS GREEN, GREEN OCHRE, PARMA VIOLET, CARMINE RED, YELLOW OCHRE


Monday, July 27, 2015

No Stamping Mini Album Tutorial


Hello and welcome back, so excited to share with you my No Stamping Mini Album, tons of ideas out there for albums and I thought it would be fun to try no stamping on one.  I know crazy huh!  Anyway, lots of photos here, and I hope you get a chance to create an album.  I am doing this tutorial for One Crazy Stamper.  Thanks again for stopping and I look forward to your comments, tell me what you think.  Cheers!

5x8 Album


Back cover outer pieces cut two card board or chip board 5x8, and one 2x8 for this


I cut this white card-stock 8 x 8 1/2" I put lots of double sided adhesive on here, and it has to stay glued and help bend and fold it hold the back together. I would not recommend using liquid glue, as it might shift while drying.
 

I used card stock to cover the back, this can be solid or pattern, up to you with this part.


For the binding or where the pages will go, I will add my scratch paper here for you to sort of see what I did as I am not sure words work so well.  
Here I go: Card Stock for the binding 7 1/4 x 11 1/4 
Score at 2" on each end then score at 1/2", 1/2", 1/4", 1/2", 1/2", 1/4"
When placing the double side tape put in the center of the row between the score lines. The tape will go right after the 1/4" score on the 1/2".  * Important That the Tape does not go on the 1/4" spot. See Scratch paper below for a better view on where to put it. Then fold and bend back and forth this is where the pages will be adhered too.  So will be need to move back and forth for turning.  I only put one row of tape on it  at a time and take off the backing of the double sided tape and do the next row, other wise you might have stuck the wrong one to the next fold. 


Then when centering the binding on the back cover you can measure the middle/center and put a mark on it, it will be covered with paper anyway.  I took my scoring tool and went over the folds and creases once it is adhere. The album will be able to bend, open and close. 

I covered the rest of the album.  I used solid card stock here. 

 
This is what it looks like finished.


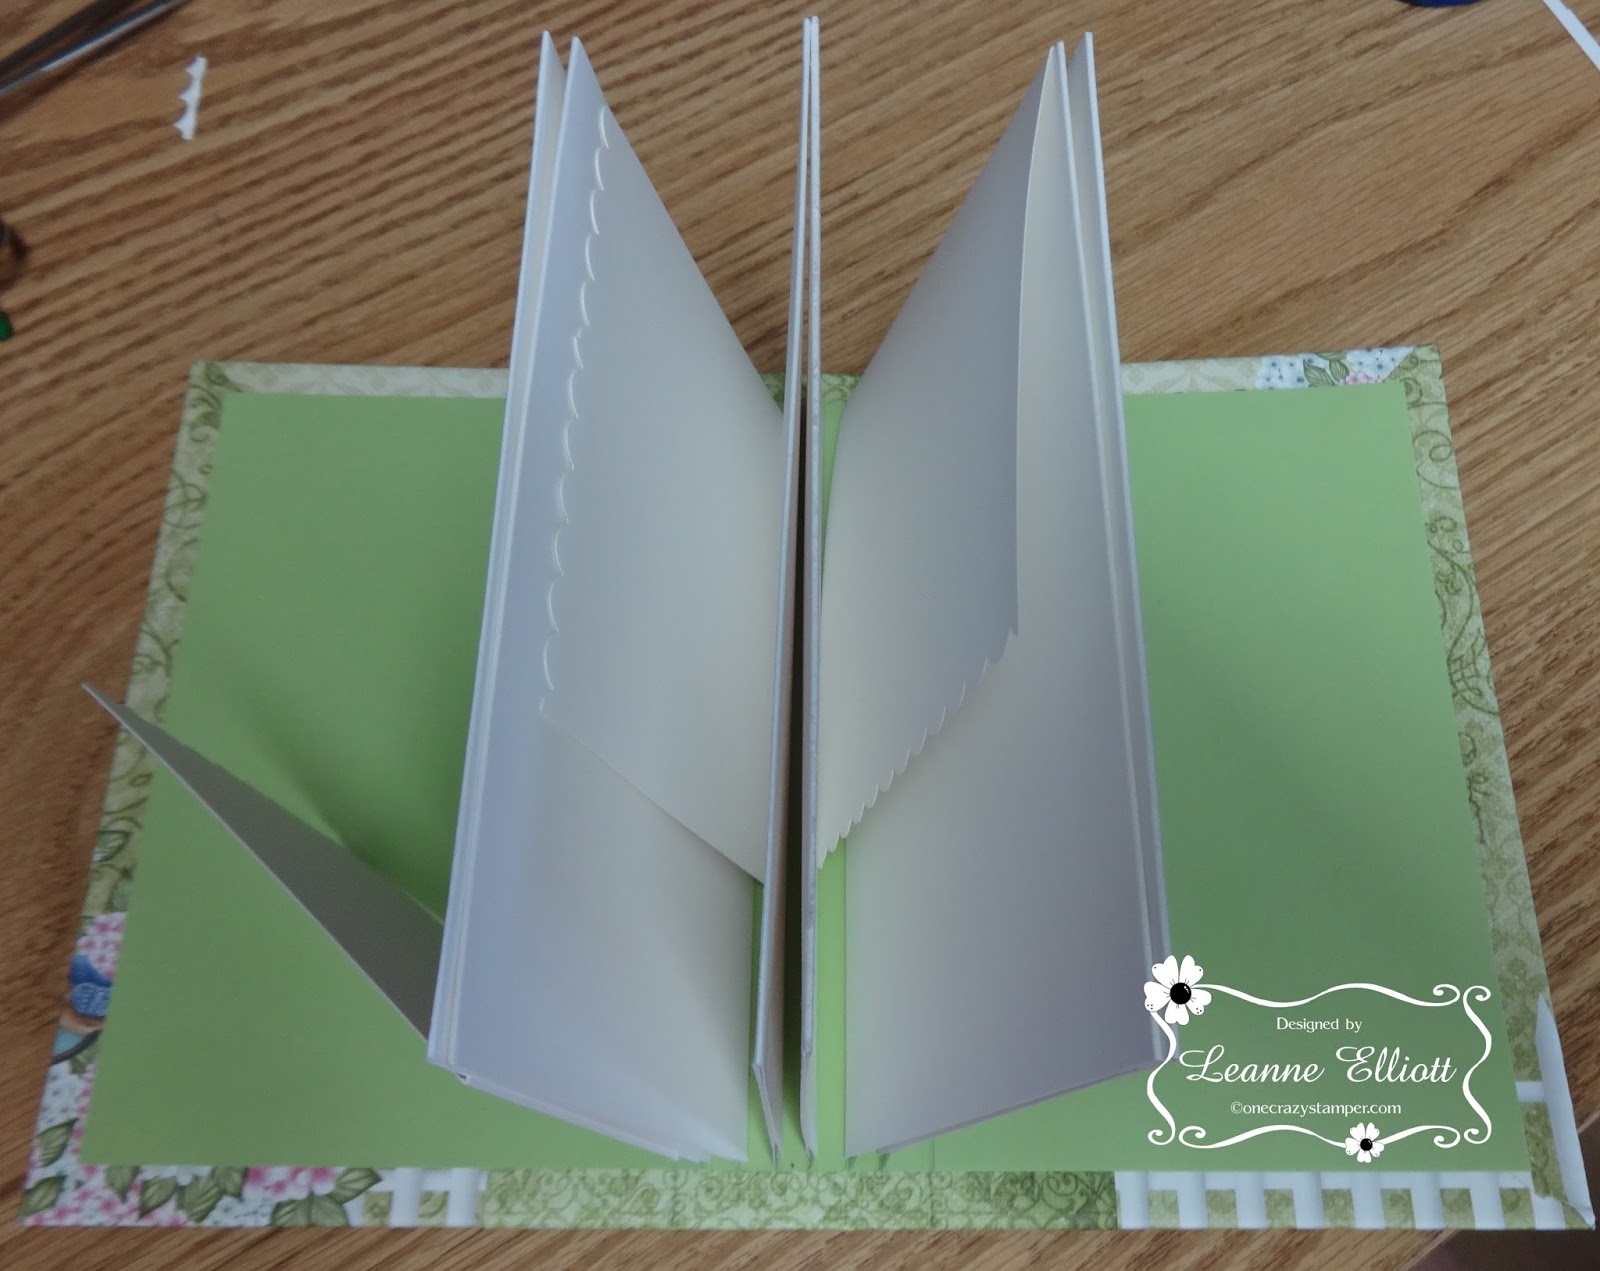
4 3/4" x 7" For the pages, you can do it this the way like I have or single sheets, I folded them to be stronger and also was able to add flaps or folded inserts in them as well.  I slid the card stock inside the two and adhere it, and you later can add the pattern paper or lined paper for journal-ling.  Also I used a border punch on the bottom of the flap.   The flaps or inserts can be whichever sizes works for you mine are 3 3/4" x 4" and  can be opened either way.


When adhering the pages I put double sided tape on the green card stock the folded binding, and then add the pages.  I think you might be able to put the tape on the pages first, not sure, as I didn't.


For the following photos I used the pattern paper to decorate them.


Here is the shot from the top of the closed album.


Here is the close up of the chain and 'S' hook and ring.  I glued on the album to close it. 

Adding the fastener I used glue-dots and and small piece of chain, and 'S' hook.
  Thanks again, and this was done without stamping and the paper I used is from a few sheets from this wonderful paper collection!


Supplies-HFC-Birds and Blooms Collection, Adhesive, Double Sided Tape, Dies, Chain, Jump Ring and S-hook, Foam Tape, Border Punch.
Album size 5" x 8"-Cover (Back), 4 3/4" x 7" pages.


Saturday, July 25, 2015

Vintage Babes!

Happy Saturday!

It's the weekend.....yippeeeee! Today I am sharing with you a card I made using the Art Impressions stamp set called "Bathing Suit Set". This is such a cute set with a vintage vibe to it!
I tried to stay with the vintage vibe when I chose my papers and embellishments. I decided on paper from the Teresa Collins You Are My Happy 6x6 collection. Using Antique photo Distress ink, I edged all my papers to help them stand out. I also added a peach coloured doily, some lace and pearls. Of course my best friend clear Wink of Stella came along on the hats, and different parts on each ladies suits.
Here's the inside of my card. I love the sentiment, it cracks me up! I think it might be my new motto LOL!
Copics Used:
Skin: E00, E11, R20, R35
Hair: E41, E43, E44
Reds: R20, R21, R22, R30, R32, R35
Greys: W1, W3, W5
Ground: W0, W1, W2
Outline shadow: W00

Don't forget to enter into our current Challenge "Anything Goes"! And while you have a minute check out the online One Crazy Stamper store for great finds!
Happy Crafting!
Supplies:
From my stash: Teresa Collins paper, doily, lace, PPP Stitched Borders