Showing posts with label Distress Inks. Show all posts

Wednesday, June 27, 2018

Adventure Awaits


A very happy Wednesday to you all!  It's time to showcase another great image from High Hopes Rubber Stamps.  This week it's Harley!


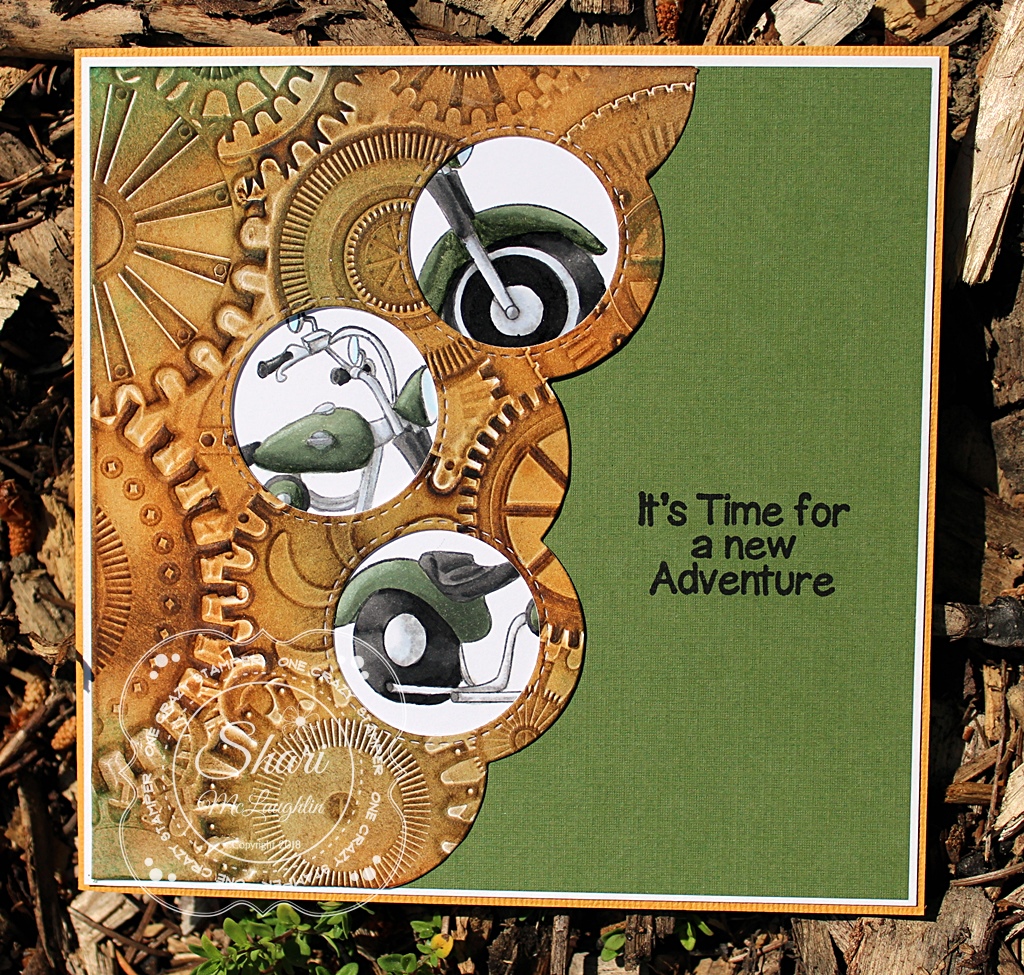
The image was stamped twice on to Copic Xpress It Card stock with Memento ink and then colored with Copics.  To create the patterned paper I used the amazing Sizzix 3D embossing folder called Gears, which after embossing I used Peacock Feathers, Rusty Hinge and Ground Espresso distress inks to add color.  The embossed paper was then cut with the My Favorite Things Die-namics Stitched Triple Peek-a-boo Window and Edge, and then I randomly placed parts of the stamped image in the opening created by the die.  The sentiment is also from High Hopes Rubber Stamps and can be found here.

Card Recipe - Copics -  T5, T7, T10, BG90, BG93, BG96, BG99, C2, B00, Colorless Blender


Wednesday, April 4, 2018

Imagine Dragons

Welcome to another Wednesday and my card for One Crazy Stamper.  The design team divas are showcasing the wonderful new release "A Magical Day" from High Hopes Stamps, and when I first saw these cute dragons I just couldn't wait to color them!!


This is "Dragon Pals" have I stamped with Cement Grey Memento Ink on to Copic Xpress it cardstock and then colored with Copics.  The dots on the large dragon were done with a green gel pen, and I used a clear Wink of Stella brush on the wings of all three characters.  The sentiment is also from High Hopes Stamps and is available here.  I inked the sky with Tumbled Glass distress ink, the hills were done with Bundled Sage, and the castle was inked with Hickory Smoke distress ink.  The stencils were from My Favorite Things and Tim Holtz ( the stone work on the castle ), and the castle is a die from My Favorite Things.

Card Recipe - BG11, BG13, BG15, BV01, BV02, BV04, RV52, RV55, B02, B05

Check out the design team divas each day to see the wonderful cards they share for your inspiration, and please follow us on Facebook, Instagram and Pinterest.


Wednesday, March 21, 2018

Gnomes at Night


Welcome to One Crazy Stampers release of the new High Hopes "A Magical Day" images.  Each day for the last week the design team members have been sharing their products using images from the release, and today it's my turn!!


This adorable image is "3 Little Garden Gnomes" that I instantly fell in love with!!  I stamped the image on Copic Xpress It cardstock with Memento Tuxedo Black ink, and then colored it with Copics and added Prismacolor pencils for added depth and detail.  Each gnome hat received a touch of either Wink of Stella Gold, Sakura white glaze pen or Sakura Clear Star for added sparkle, and the crystal ball has hints of the white gel pen.  The image was then fussy cut and placed on the galaxy background I created with Lucky Clover, Peacock Feathers, Twisted Citron, Picked Raspberry and Black Soot distress inks.  For even more detail on the background I used the Sakura Glaze pen to add dots to represent stars!  The sentiment is also from the new release and is available here.

Card Recipe
Copics - B0000, V0000,V000, B01, B000, Colorless Blender (0), E11, E21, E23, B24, B29, B39, V15, V17, V09, W00, W1, W3, R24, R29, R39, E33, E35,E37, G94, Y35, Y38
Prismacolor pencils - 938 White, 945 Sienna Brown, 946 Dark Brown, 1103 Caribbean Sea, 956 Lilac, 939 Peach, 208 Indianthrone Blue, 1078 Black Cherry, 1050 10% Warm Grey, 1051 20% Warm Grey, 1052 30% Warm Grey

Follow the Design Team Divas daily for more inspiration using the adorable images in the new "A Magical Day" release.  Don't forgot to follow us at One Crazy Stamper and on Facebook, Instagram and Pinterest. 


Friday, February 13, 2015

New High Hopes Image: Takin' a Break (Part 2)

Hello and Happy Friday!  This week one of my great friends (also she was my Maid of Honor) celebrated her 40th Birthday.  We met in High School, we share the same name with the same rare spelling and we both LOVE cows -  and this is the card that I made for her....
 I know what you are thinking, hey she used this image already- well yes I did and I just wanted to show you that not every cow has to be black & white.  At the end of the post I will show you my two "Takin' A Break" cards side by side so that you can see that this image is so easily used with different colours and that they look completely different.

Here is a look at the inside of the card....
 Supplies Used:
* Image:  High Hopes Stamps, Takin' A Break
* Inside Sentiment:  High Hopes Stamps, Thinking of You & Smiling
* Inside HB Sentiment:  High Hopes Stamps, Bold Happy Birthday
* Copic Xpress It Cardstock
* Copic Sketch Markers
* Spellbinders: Labels 8
* Memento Inks: Rich Cocoa (stamped the cow & HB) & Rose Bud
* Distress Inks: Vintage Photo
* 3D Pop Dots
* Papers:  Carta Bella 6x6 Giddy Up Boy & Girl Paper Pads
* Glue Dots

Here is a close up of this amazing cow to see the Copic colours used....
 Copic Colours Used:
* Light Brown:  E43, E42, E41, E40
* Dark Brown:  E49, E47, E44

As promised here is a look at today's card as well as my previous Takin' A Break card.  As you can see the stamp looks totally different just by changing the colours and switching the dark and light areas - this stamp is a must have for any stamper - sooooo fun to play with!....

I hope that you enjoyed today's post and I would love to hear from you.  Don't forget to pop over to www.onecrazystamper.com to purchase your Takin' A Break stamp!


Until Next Time, Keep Crafting!
Hugs;

Friday, January 16, 2015

New High Hopes "Takin' A Break"

Hello and Happy Friday!!  I hope that you have had a great week and have kept warm in this deep freeze we have been having!!!??

Today I have a card to show you that I mad just because.  If you know me you know that I love Cows, so I could not resist using this new adorable stamp from High Hopes Stamps.  I had so much fun making the card, I hope you like it....
 As you can see I3D popped the cloud as well as a piece of cloud I cut out of the paper to add dimension. I also "Smudged" around the outside of the card, the fence and the cloud with Distressed inks.  I added 3 layers of grass to add depth to the card too =)

Here is a look at the inside of the card, saving lots of room to write to the friend the card is for....
 Supplies Used:
* Copic Xpress It Cardstock
* Copic Sketch Markers
* Memento Ink: Tuxedo Black
* Distress Inks:  Mowed Lawn, Peacock Feathers and Gathered Twigs
* Paper (Clouds and Grass): Carta Bella 6x6 Its a Celebration Paper Pad
* 3D Pop Dots
* Squishy Scissors
* Cloud Die
* My Favorite Things Die-Namics: Woodgrain fence
My Favorite Things Die-Namics: Fresh Grass
* Sakura White Gel Pen (for dot in center of eyes)

Here is a close up of the adorable cow to see the Copic colours used....
 Copic Colours Used:
* Black:  W9,W7, W5
* White:  W1, W00
* Horns:  W3, W1, W00
* Eyes:  B39, B37
* Muzzle:  R02, R01, R000, W1, W00

I hope that you enjoyed today's post, I would love to hear your thoughts.


Until Next Time, Keep Crafting!
Big Hugs;

Wednesday, August 27, 2014

Fun with Embossing Folders and Stencils

Hi All;

This is my last post for this month's Creative Inspiration here at OCS.  Today, I have a card as well as a project showing what creative fun can be had using embossing folders and stencils and various types of medium.  As this a bit long, why not have a coffee or tea while you read this and hopefully gleam some inspiration and ideas.

This is the finished card that I made using the Butterfly Swirl (Ecstasy Crafts), used with the following Inka Gold colours: Apricot, Rose Quartz, Mint Green and Platinum.  Now, I will show you how I reached this finished product and what I played with before deciding to use this for my card.


I used the Foundry (Provo Craft), Winter Chill (Ultimate Crafts) and Butterfly Swirl (Ecstasy Crafts) Embossing Folders.


For the Foundry embossing folder, I used my finger to add Copper and Platinum Inka Gold and then added some Gold 3D Stamp Paint over it with a dabber.


Unfortunately, the glitter from the Gold 3D Stamp Paint by Viva Decor isn't showing up very well in the photo. 

For the Winter Chill embossing folder, I used the Ice Blue Inka Gold and then added some Glitter Ritz Cool Highlight over top. 


For the Butterfly Swirl (Ecstasy Crafts), I did two samples: one using Inka Gold (the card) and the other one using the Prima Resist Chalk Edges in the following colours:  Pastel Green, Pastel Yellow, Pastel Peach, Pastel Blue and then added some Clear Wink of Stella over top.


For the Stencils, I used All Stars (Memory Box), Spring Flowers and Brick Wall both from My Favourite Things.

For the All Stars (Memory Box), I used Metallic Melon and Gold Gelatos. I used stencil tape to keep the stencil flat on the paper and used a paint brush to add the colours.


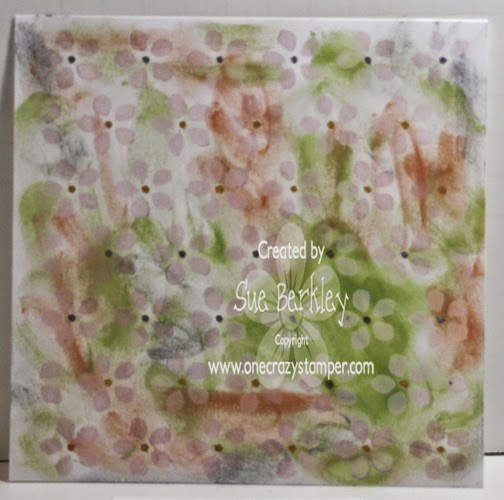
For the Spring Flowers stencil from (My Favourite Things), I added Apricot, Mint Green and Ice Blue Inka Gold as a background, which didn't quite turn out as I wanted it to.  I then taped the stencil over the background and used the Pastel Peach and Pastel Purple Prima Resist Chalk Edgers and then added Gold and Silver Atyou Spica Glitter Pens for the centres of the flowers. 


For the Brick Wall another My Favourite Things Stencil, I used cork instead of paper and Ranger Distress Ink Fired Brick, which worked out really well. 


I hope this has given you some ideas to play with.  The majority of these items can be found at Lora's OCS store. 

Until next time, be creative and have some fun.