
If you have never heard of an exploding box/card you are in for a special treat.

Supplies Needed:
* 2 pieces of matching 12x12 Bazzill Cardstock (1 for the box at 12x12 and 1 for the lid at 6-1/8x6-1/8)
* Paper Trimmer
* Scor-Pal
* Scor-Tape
* Squishy Scissors (+craft knife and ruler if desired)
* 6" Circle Die Cutter (cut 1 using scrap from lid)
* Scotch tape
* Dee's Distinctively Snow-covered Tree Die Large
* 2 6x6 pieces of patterned paper to cut out your tree shapes from
* 1 6x6 pieces of patterned paper for inside of the box and cut 4 squares at 3x3 each
* Coordinating cardstock to mount your 3x3 patterned paper squares - cut 2 pieces at 3-1/2"x3-1/2" and cut 1 piece at 3-1/2"x7-1/2"
* High Hopes Stamps Sentiments: Holiday All Year & Magic of Christmas (you can use up to 3 sentiments on the inside if you wish depending on your patterned paper choice. My paper allowed for 2 sentiments and with the last square I left it blank to put my "To & From" and special Christmas message for the recipient.
* Memento Ink: Rhubarb Stalk
* Tape Runner
* Best Glue Ever! (love love love this glue!!)
* 1" Sheer Ribbon to wrap around the box and lid twice plus a little to decorate the top of the box as well
* Marianne Design Poinsettia Die
* Red & Green cardstock to make the Poinsettia
* Glue Dots
* 1 Yellow Gem (Rhinestone)
* Embellishments if desired for inside the box
So lets get started now that you have your supplies......
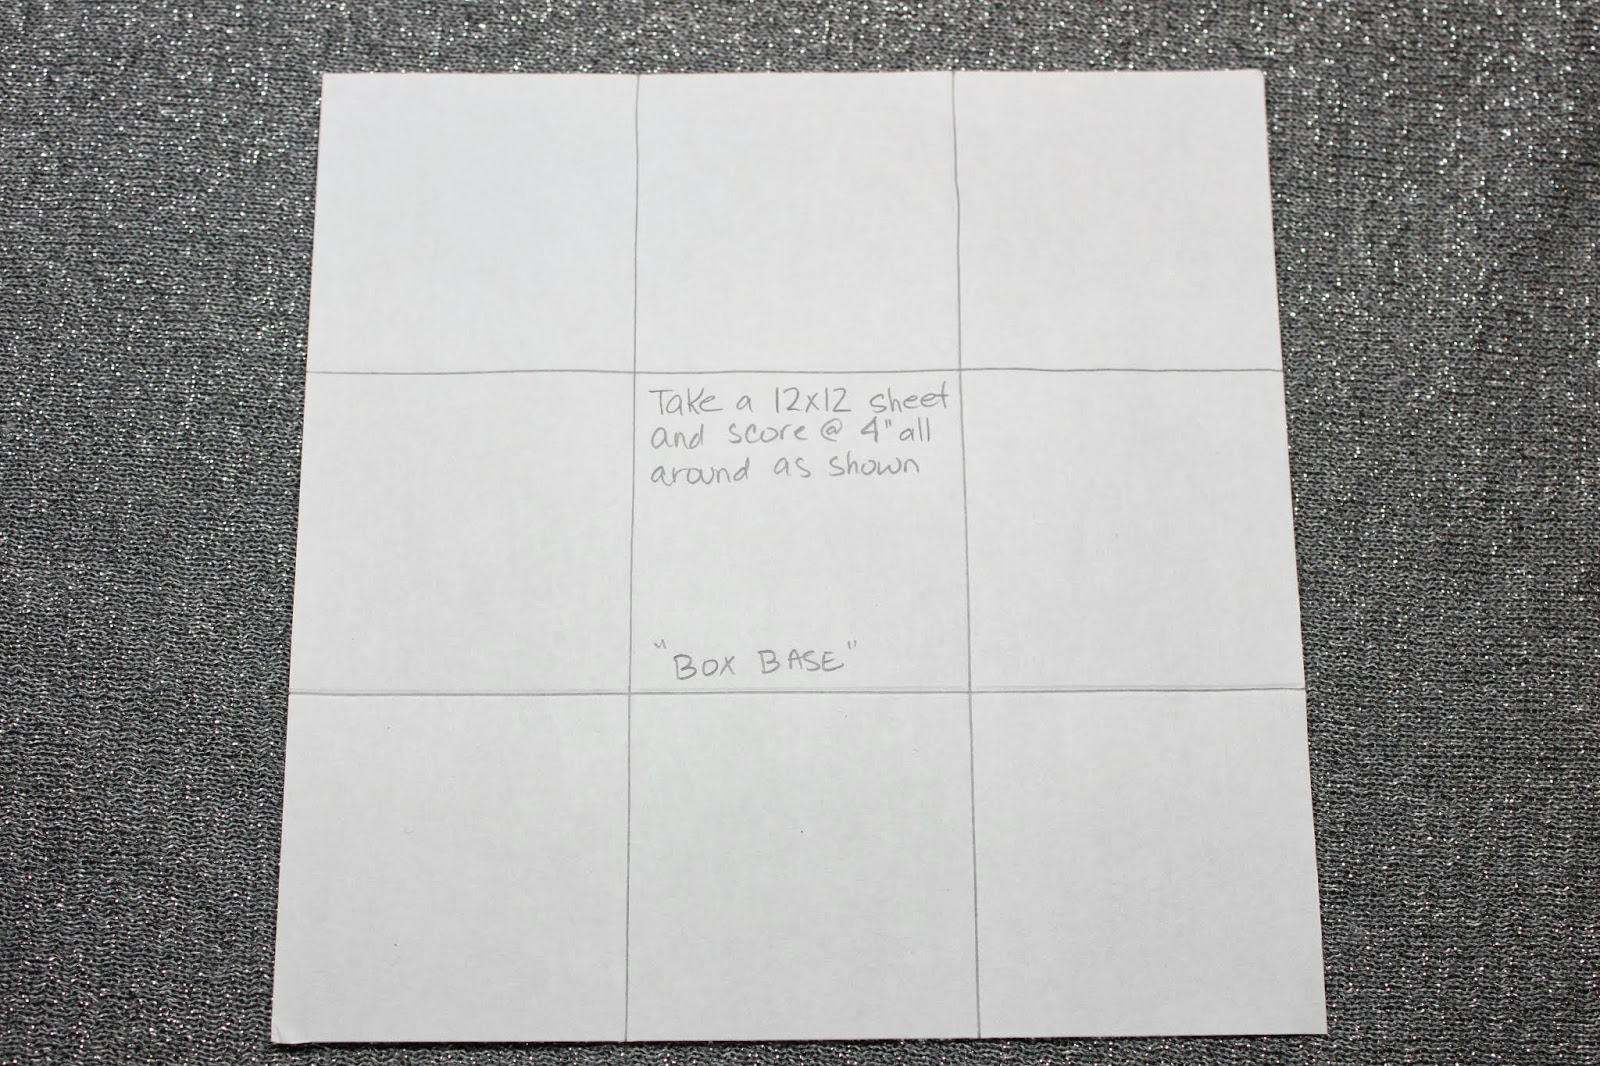
Step 1) Build your Box Base: Using your 12x12 cardstock piece and your Scor-Pal, score at 4" and 8". Turn your paper once and score again at 4" and 8" again. You should see 9 squares on your 12x12 cardstock - see photo below....
Step 2) Cut out using either scissors or your craft knife and ruler, the 4 outside corners of your scored 12x12 cardstock - see photo below....

Step 3) Build the Box Lid: Using your 6-1/8"x6-1/8" cardstock and your Scor-Pal, score each side at 1" all around the square - see photo below....

Step 4) On 2 ends of the scored 6-1/8"x6-1/8" cardstock, cut to the cross score lines, then score over. Add Scor-Tape to the ends of the long cut areas and to the scored over short pieces at the bottom, this step will secure your lid - see photo below....

Here is a look at the completed lid (upside down)....

Step 5) Making your tree: Take your 6" circle and fold in half. Cut along the folded line with either your paper trimmer or scissors so that you have a half circle. Then take your half circle and form into a cone and secure with Scotch tape - see photo below....

Step 6) Using your 4 sets of Dee's Distinctively Snow-covered Tree, starting with the larges pieces of the cut outs put tape runner or Best Glue Ever! on the backside and stick evenly around the bottom of the cone. Be sure to have some of the tree "boughs" extend past the cone as this will be how you will stick your tree to your box. Continue this step with each layer of the tree till you reach the top - see photo below with the die, patterned paper I used and also the covered cone (tree)....

Here is a closer look at the completed tree....

Step 7) Decorating the outside of the box & lid: Attach ribbon to the box on the outside and secure on the inside with Scotch tape. Be sure to match up the ribbon lines on both the lid and box so that when the box is assembled it looks like the ribbon is all in a line and has a "wrapped" look. The reason this step is completed now is so that when you complete the inside of the box your 3x3 mounted squares will cover up the ends of the ribbon and Scotch tape.
Step 8) Poinsettia: Cut and create your poinsettia for the top of the lid. I used glue dots to layer the petals of the flower then I added a gem to the center of the flower. Add Ribbon strips or loops to decorate under the flower if desired and attach to the top of the lid using Best Glue Ever! - see photos below of the top view....

Side view of the Poinsettia....

Step 9) Decorating the inside of the box: Stamp all your sentiments on your decorative 3x3 paper as desired - see photo below....

Step 10) Attach the 3x3 squares to the mounting cardstock - see photo below....

Step 11) Attach the mounting cardstock with your decorative paper to the back part of the inside of the box. I decided to create a "wall" for my box, then attach the two remaining squares to the inside of the box - see photo below....

Step 12) Attach the tree to the center of the box base: Using Best Glue Ever! put glue to the rim of the cone inside the tree and on the over hanging boughs of the tree and attach to the center of the box base. Embellish the base around the tree if desired with presents, snowflakes, etc.
And here is your Exploding Christmas Tree Box/Card all wrapped up to give away....

See completed project below....

Thank you for sticking with me till the end and I hope that you enjoyed today's tutorial and will give it a try. I would love to hear what you thought of this project!
Until Next Time, Keep Crafting & Merry Christmas!
Hugs;

Awesome project and also a wonderful gift idea.
ReplyDeleteHugs Desíre {Doing Life}
Shari, this is an awesome tutorial and a great gift idea for any time.
ReplyDeleteThis is great and and a wonderful gift for someone. Thank you for giving the instructions.
ReplyDeleteLove your exploding box and tutorial!!!
ReplyDeleteThis is awesome ty so much for sharing
ReplyDeleteSheer Ribbon is really a good material for gift wrapping, so is Satin Ribbon. Thank you for giving the instructions.
ReplyDelete