Showing posts with label Scor-Pal. Show all posts

Wednesday, February 25, 2015

Accordion Style Card Holder and Card Organizer Holder Tutorial

Hi Fellow Crafters;

Wacky Wednesday is here again and there is definitely a chill in the air.  It seems that a record will be set for this month as being the coldest February on record.  Instead of a card for my OCS post today, I have a tutorial for two different styles of card holders or as a possible recipe holder.  The first one is an Accordion Style Card Holder, that I saw on SplitcoastStampers originally done by Jane Matsumoto.  The second one, is from InkStainswithRoni blog and is done in a completely different manner and is definitely more fiddley to do. 

Both of these holders will hold 4 1/4" x 5 1/2" cards and or recipes.  Either one can make a nice gift for someone special.

So make yourself a cup of coffee or tea and take a few minutes and have a browse.  I hope you find this useful.  My next little project will be to create something that will hold cards between 5" x 5" to 6" x 6".

Accordion Style Card Holder


 Supplies


Supplies used -- this can be done with one sheet of 12" x 12" double side patterned cardstock as well as one sheet of  8 1/2" x 11" white cardstock.

The 12" x 12" cardstock was cut to the following sizes:
  • 1 piece of  6" x 12" patterned paper
  • 1 piece of  4" x 6" patterned paper
  • 2 pieces of 3 3/4" x 4"patterned paper
  • 1 piece of 2" x 6" patterend paper
  • 3 pieces of 3 7/8" x 5 1/2" white cardstock
  • 3 circles approximately 3/4" each in white cardstock (instead of a circle punch I used the 2nd smallest Spellbinder Standard Circle die)
Other Supplies:

Instructions:
Step 1:
Score the 6" x 12" patterned paper at 4 1/2", 6 1/2" and 11".  This will form the base.

Step 2:

Score the 4" x 6" piece of patterned paper at the 2"mark and fold in half.  Use the decorative edge punch on one end and attach this piece along the scored 1" section of the base with Scor-Tape.


Step 3:

Score both pieces of the 3 3/4"x 4" patterned paper every 1/2" across the 4" side.

Step 4:


Crease the scored lines well and attach the accordion pieces to the sides of the base.  Take care to line up right along the edges of each panel.

Step 5:


I forgot to take a photo showing where the ribbon should be added.  Scor-Tape is added to the seam underneath the top flap (decorative edge) and attach the ends of the ribbons about 1 1/2' from each end.  The 2" x 6" piece of patterned paper is adhered to cover the seam and the ends of the ribbons.


Step 6:

I used some peel off stickers to add as labels to the circles and adhered the circles to the backs of the 3 7/8: x 5 1/2" cardstock pieces, which are then inserted into the accordion slots.

Step 7:

I attached a Hook and Loop Fastener Tab (Tombow) to the front panel. 


Card Organizer Holder


This card organizer was seen on InkStainsRoni's blog here and is much more fiddley to make.  The basic organizer users 2 pieces of 12" x 12" heavy cardstock plus design paper.

Step 1:

Cut one piece of the white cardstock in half so that there are 2 pieces of 6" x 12".

Step 2:

Using one of the 6" x 12" pieces of cardstock, score at the following at the following measurements of 2", 4 1/8", 9 1/8" and 11 1/8".   If using the Scor-Pal, score at the 2" mark and fold.  Slide the fold over to the endge and score at the 2 1/8" mark and fold.  Slide this fold over to the edge and score at both the 5" and 7" marks.  Once all the folds have been done at the score marks, this sheet of cardstock will form the outer covering of the organizer.


 Step 3:


Cut the second sheet of cardstock at 7" x 12.  Score the 12" side at 1", 3", 9" and 11".  Turn the cardstock to the 7" side and score at the 1", 3" and 6" marks.

 Step 4:


Turn the second sheet of carstock so that the 12" side is at the top.  There are 3 small sections, in each of the bottom corners that need to be trimmed away: - a 1" square in the corner with two 1" x 2" rectangles as show.


Step 5:

Fold the 1" flap along the top down and just tack it down.  Fold the 2" square flaps down and apply adhesive to each.  Stand the 12" piece up and adhere the 2" square flaps to the 2" x 3" sides.  The inner container is beginning to take shape -- apply adhesive to the 1" flaps.

Step 6:

The container slides into the outer shell of the organizer as shown.  Add adhesive to the bottom and 1" flaps to the organizer.  Cut a 4" x 6" piece from the original piece of cardstock that was set aside and adhere it to the 1" flap of the organizer shell.  A pocket can be added in the decorating stage to hold postage stamps.

Step 7:


I added the designer paper at this point, but I really wonder if it might have been easier to do that before everything was adhered together. 

I attached a Hook and Loop Fastener Tab (Tombow) to the front panel and inside the lid flap.

I hope you found this useful.  Until next time, keep crafting and remember to stay tuned for Sunday, when OCS will have a brand new challenge.

Lots of  Hugs,


Friday, November 8, 2013

Tutorial Time! Exploding Christmas Tree Box / Card

Hello and welcome to my exciting Friday Tutorial Post.  Today I would like to show you how to create an EXPLODING CHRISTMAS TREE BOX/CARD.  I am going to warn you that this post is very picture heavy but well worth the look.  Please take the time to read all the way through and let me know what you thing =)

If you have never heard of an exploding box/card you are in for a special treat.

Don't let the list of supplies needed to scare you off as most of the items listed are items you will already have in your craft tool box along with some special pieces that I used =)

Supplies Needed: 
* 2 pieces of matching 12x12 Bazzill Cardstock  (1 for the box at 12x12 and 1 for the lid at 6-1/8x6-1/8) 
* Paper Trimmer
* Scor-Pal 
* Scor-Tape 
* Squishy Scissors (+craft knife and ruler if desired) 
* 6" Circle Die Cutter (cut 1 using scrap from lid) 
* Scotch tape
* Dee's Distinctively Snow-covered Tree Die Large 
* 2 6x6 pieces of patterned paper to cut out your tree shapes from 
* 1 6x6 pieces of patterned paper for inside of the box and cut 4 squares at 3x3 each 
* Coordinating cardstock to mount your 3x3 patterned paper squares - cut 2 pieces at 3-1/2"x3-1/2" and cut 1 piece at 3-1/2"x7-1/2"
* High Hopes Stamps Sentiments: Holiday All Year & Magic of Christmas (you can use up to 3 sentiments on the inside if you wish depending on your patterned paper choice.  My paper allowed for 2 sentiments and with the last square I left it blank to put my "To & From" and special Christmas message for the recipient.
* Memento Ink:  Rhubarb Stalk
* Tape Runner
* Best Glue Ever! (love love love this glue!!)
* 1" Sheer Ribbon to wrap around the box and lid twice plus a little to decorate the top of the box as well
* Marianne Design Poinsettia Die
* Red & Green cardstock to make the Poinsettia
* Glue Dots
* 1 Yellow Gem (Rhinestone)
* Embellishments if desired for inside the box

So lets get started now that you have your supplies......

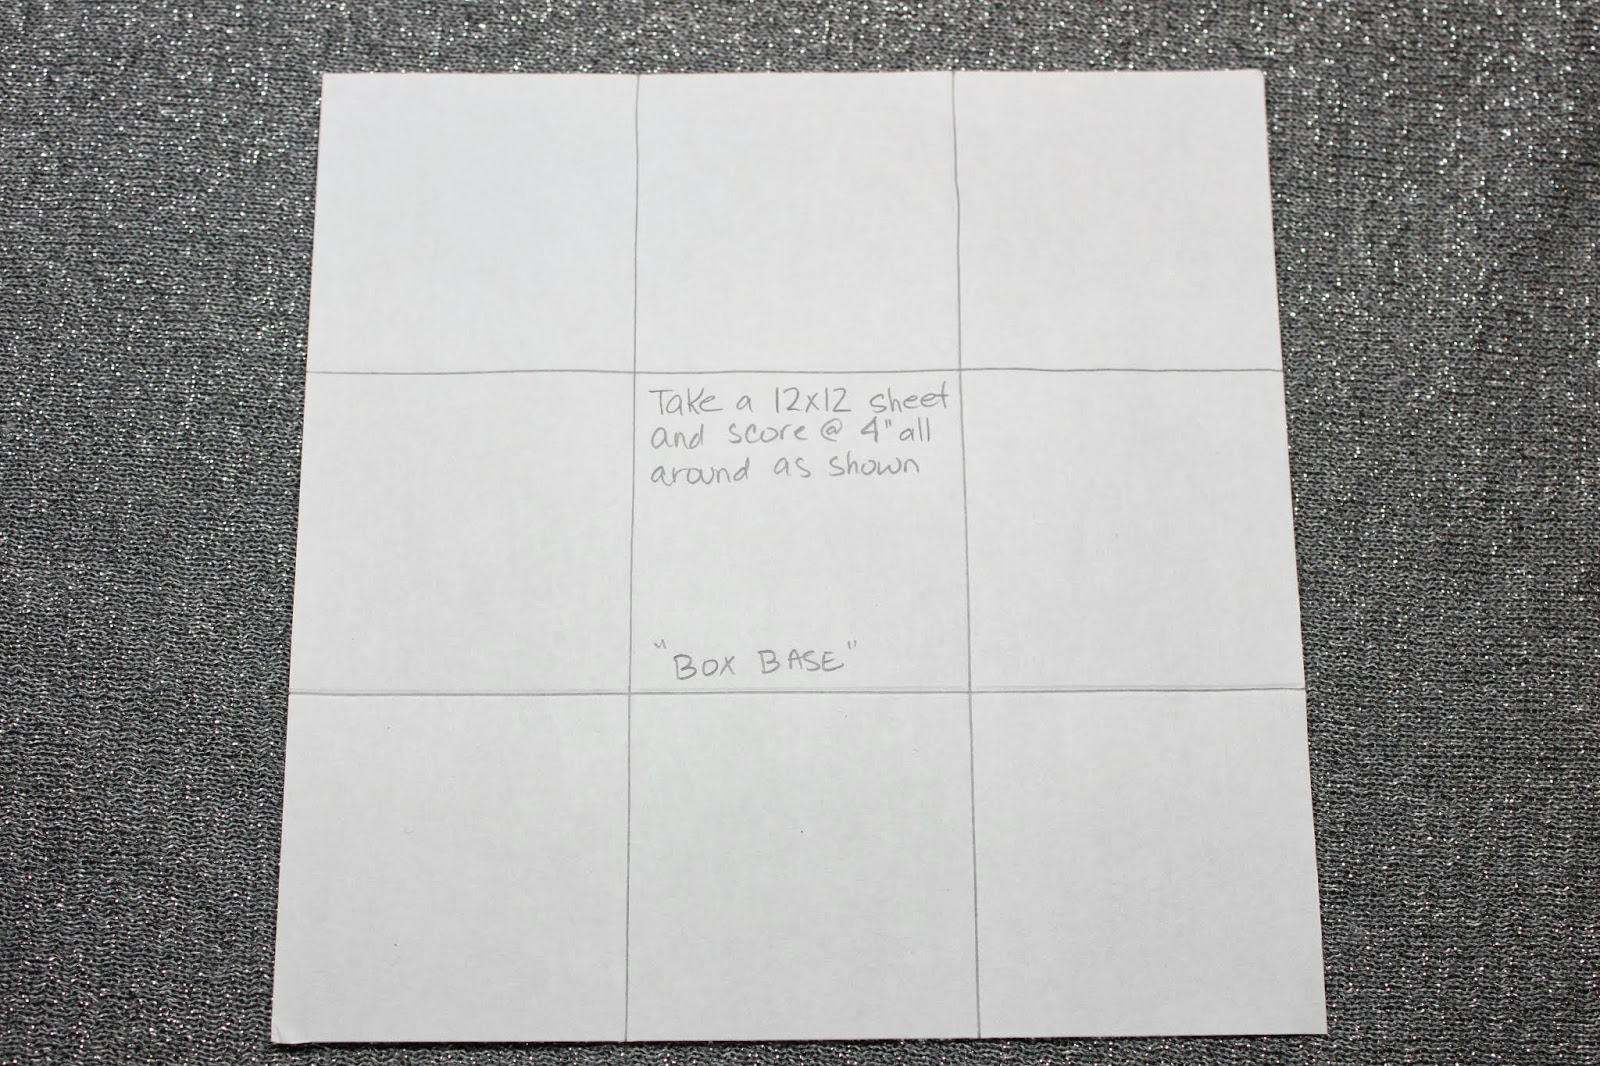
Step 1)  Build your Box Base:  Using your 12x12 cardstock piece and your Scor-Pal, score at 4" and 8".  Turn your paper once and score again at 4" and 8" again.  You should see 9 squares on your 12x12 cardstock - see photo below....

Step 2)  Cut out using either scissors or your craft knife and ruler, the 4 outside corners of your scored 12x12 cardstock - see photo below....

Step 3)  Build the Box Lid:  Using your 6-1/8"x6-1/8" cardstock and your Scor-Pal, score each side at 1" all around the square - see photo below....

Step 4)  On 2 ends of the scored 6-1/8"x6-1/8" cardstock, cut to the cross score lines, then score over.  Add Scor-Tape to the ends of the long cut areas and to the scored over short pieces at the bottom, this step will secure your lid - see photo below....

Here is a look at the completed lid (upside down)....

Step 5)  Making your tree:  Take your 6" circle and fold in half.  Cut along the folded line with either your paper trimmer or scissors so that you have a half circle.  Then take your half circle and form into a cone and secure with Scotch tape - see photo below....

Step 6)  Using your 4 sets of Dee's Distinctively Snow-covered Tree, starting with the larges pieces of the cut outs put tape runner or Best Glue Ever! on the backside and stick evenly around the bottom of the cone.  Be sure to have some of the tree "boughs" extend past the cone as this will be how you will stick your tree to your box.  Continue this step with each layer of the tree till you reach the top - see photo below with the die, patterned paper I used and also the covered cone (tree)....

Here is a closer look at the completed tree....
 
Step 7)  Decorating the outside of the box & lid:  Attach ribbon to the box on the outside and secure on the inside with Scotch tape.  Be sure to match up the ribbon lines on both the lid and box so that when the box is assembled it looks like the ribbon is all in a line and has a "wrapped" look.  The reason this step is completed now is so that when you complete the inside of the box your 3x3 mounted squares will cover up the ends of the ribbon and Scotch tape.
 
Step 8)  Poinsettia:  Cut and create your poinsettia for the top of the lid.  I used glue dots to layer the petals of the flower then I added a gem to the center of the flower.  Add Ribbon strips or loops to decorate under the flower if desired and attach to the top of the lid using Best Glue Ever! - see photos below of the top view....

Side view of the Poinsettia....

 
Step 9)   Decorating the inside of the box:  Stamp all your sentiments on your decorative 3x3 paper as desired - see photo below....

Step 10)  Attach the 3x3 squares to the mounting cardstock - see photo below....

Step 11)  Attach the mounting cardstock with your decorative paper to the back part of the inside of the box.  I decided to create a "wall" for my box, then attach the two remaining squares to the inside of the box - see photo below....

Step 12)  Attach the tree to the center of the box base:  Using Best Glue Ever! put glue to the rim of the cone inside the tree and on the over hanging boughs of the tree and attach to the center of the box base.  Embellish the base around the tree if desired with presents, snowflakes, etc.

And here is your Exploding Christmas Tree Box/Card all wrapped up to give away....

See completed project below....

Thank you for sticking with me till the end and I hope that you enjoyed today's tutorial and will give it a try. I would love to hear what you thought of this project!

Until Next Time, Keep Crafting & Merry Christmas!
Hugs;
 

Saturday, April 9, 2011

TGF and a Copic Tutorial

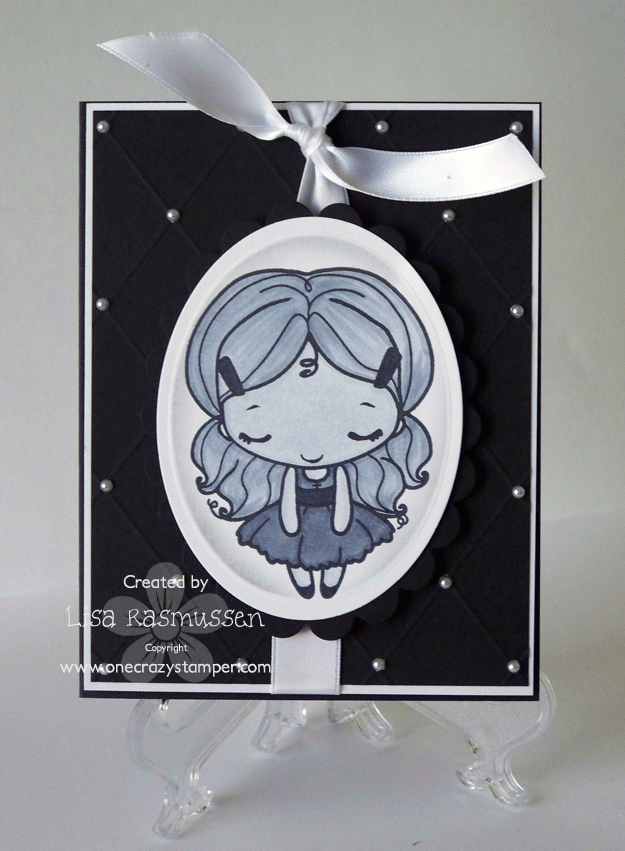
Hi all!  I have a super fun tutorial to show you today that shows you how to do a fun coloring project with your Cool Grey Copics!  I used some of the new products from the store.  You know how I LOVE The Greeting Farm stamps!  This tutorial features Fancy Anya.


Hope you enjoyed this tutorial and I would love to see you use this tutorial.  Leave me a link if you do so I can see your creations!

Supplies:  Scor pal, Kaiser Pearls, Oval Nesties, TGF-Fancy Anya, Copic-Sketch