Wednesday, May 15, 2013

Little Boys Are A Gift

Welcome to another Wonderful Wednesday at One Crazy Stamper.  It is once again my turn to show you a project that uses supplies from One Crazy Stamper store.  I am very bad at "collecting" the cards I have made instead of sending them but am proud of myself that the last 5 cards (including today's here) I have given away.  Any one else like me and make more cards than they give?

Today's card I made for a friend who had a baby boy.  I used an adorable image from High Hopes along with the matching sentiment.  Oh, and there is a girl version of this as well.


A close up of the monkey:


Copics Used: Monkey ~ R20, R22, E31, E33, E35, E37, E39; Blanket ~ YG03, YG05, YG07, B01, B02; Binky ~ YG03, YG05, YG07; Top ~ B00, B01, B02; Diaper ~ E50, E51, B02, B05, E25;
Bear ~ R20, R22, E04, E41, E42, E43

Thanks for dropping by today.  We are half way through May but you still have time to enter our flower challenge for the month.  See the pinned post for all the details.  Have a great day and happy crafting,

Hugs,


Tuesday, May 14, 2013

The Secret Gardener

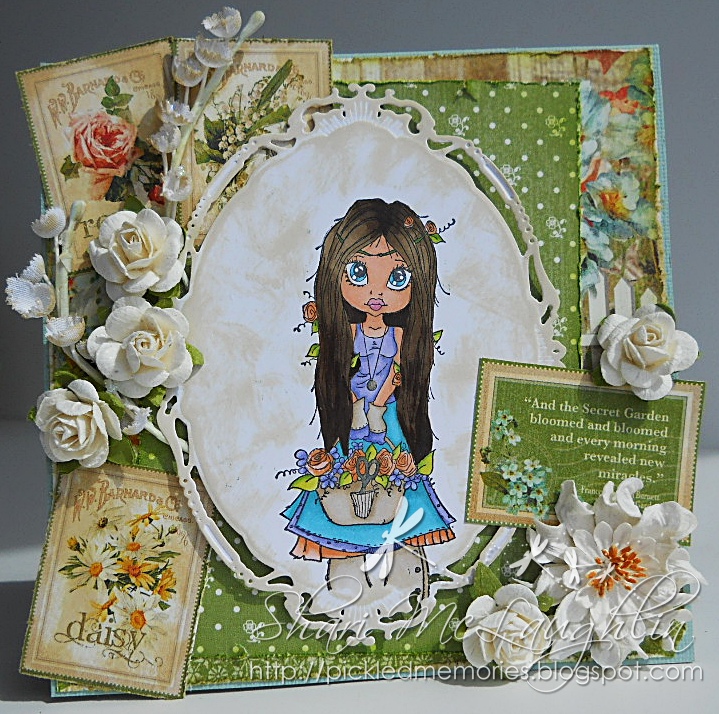
Tomorrow is moving day for me - so I am scheduling this post a whole month in advance. I am hoping that when this card goes live, spring will have finally arrived here in Alberta, and that the spring flowers are in full bloom. The theme for this months challenge here at One Crazy Stamper is Flowers, and this card fits the bill perfectly.

This gorgeous young lady is Gardener Gayle from Saturated Canary, which I have colored with Copics. The image was then cut with one of the newest Spellbinders dies called Opulent Ovals, then the edges and background were inked with the Antique Linen Distress Ink Pad. The card front has layers of designer paper from Graphic 45's Secret Garden collection, and various Prima flowers. The centers of the lily of the valley flowers all received a bead of Frosted Lace Stickles.


Monday, May 13, 2013

Hello Foxy!

I’m excited to show you a new stamp set from Lawn Fawn that OCS carries.  The possibilities with this stamp set is endless, take a look at all the set includes.

crittersintheforest_1_large_edited-1

I’ve created a little scene with a few of these stamps.  I colored with my copics and fussy cut them, but OCS carries the matching dies to this set also HERE.

So I am wondering, are you a fan of Lawn Fawn stamps or are they not your cup of tea?!


Supplies: Lawn Fawn Stamps, October Afternoon papers, Copics, button, sewing, EK success star punch

Sunday, May 12, 2013

Mother's Day

Hi Everyone;

My card today for One Crazy Stamper is a card for my Mom, as today is Mother's Day.  To all the mothers out there, have a wonderful and Happy Mother's Day.

Instead of using Copic Markers, I have used Derwent Inktense Pencils and Faber-Castell Gelatos.  I ran the Garden Delight M-Bossabilities through the Cuttlebug and added the Faber-Castell Metallic Blueberry and Metallic Mint Gelatos to the top.  I then spritzed it with a bit of water and rubbed my finger all over.  After I cut the butterfly out using the Floral Ovals, I added the back stitch using a verigated metallic thread, and then distressed it using the Antique Linen distress ink.  I then added some Crystal Glamour Dust from Deco Art.

Supplies used:
There is still plenty of time to enter this month's Flower Challenge for a chance to win a prize pack from One Crazy Stamper. All the supplies I have used can be found at Lora's store One Crazy Stamper.

Until next time, keep crafting and enjoy your creativity.


Saturday, May 11, 2013

Flower Jar

Since its almost Mothers Day, I have a pretty card that I think that any mom would love. I made this one without any colouring, but used many die cuts and other embellishments. For the flower vines I just glittered the flowers and then cut a slit in the jar on my DP and tucked them in. I then added a bow die over it. For the sentiment I used a Mothers Day stamp from my stash and stamped that onto my ticket die, finishing up with a beautiful blue feather, lace trim, pins and a banner paper clip. Cute don't you think?

Im loving all the flower entires in this months "Flower" challenge, cant wait to see more!
Supplies Used
Tiny Bow(Memory Box), Geneva Vine(Memory Box), Cosmic Star Set(Memory Box), Mini Ticket Die(Whimsy),  Good Life Tickets(Whimsy), Feathers-Surf N Turf(Bella Blvd), Clear Jewel Pins(May Road), Natural Lace Trim(Kaiser Craft), Summer Fresh Paper Pad(Simple Stories)


Friday, May 10, 2013

I Dare You!

Hello and happy Friday!  Today I have a really fun card to show to you that I made for one of my Husband's friends.  For me this is a pretty plain looking card, but I wanted my focus to be on the image itself and not all the details we love to add to cards, hope you like it!
 
I think I am addicted to the Dragons from High Hopes Stamps!  They are so darn fun to colour and you totally can "silly" up the card using them LOL, here is my card I made to show to you this week....
Supplies Used >  Image: High Hopes Firefigher Dragon - Sentiment: High Hopes Stamps, I Dare you! - Copic Xpress Paper - Memento Inks: Tuxedo Black, Bamboo Leaves, Dandilion & Lady BugCopic Markers3D Pop DotsGelly Roll Glaze PenRed Pearls
 
 
Here is a closer look at this fun Dragon to show you the Copic colours used....
Copic Colours Used > * Dragon: YG67, YG17, YG03, E43, E42, E41, E40 * Greys: N4, N2, N0 * Reds: R29, R27, R24, R22 * Yellows:  Y19, Y15, Y13,Y11 * Hose:  E31, E30 * Water:  BG34, BG32, BG11
(I used to Glaze Pen on the hose, the hydrent, the sheild on the helmet, the water and on the "I Dare You!" part of the sentiment)
 
If you would like to see the inside of this card, please pop over and visit my blog =)
 
I hope that you enjoyed today's card and dont forget to enter into our fun Challenge this month - Flowers!  See you next week!
 
Until Next Time, Keep Crafting!
Hugs; 

Thursday, May 9, 2013

15 Years Ago..One of the Best Days Ever!!

Ok if you read my title you are thinking what the heck... Well 15 years ago I had my beautiful daughter Carrington...When I saw this stamp and the name of the stamp I knew I had to colour it for her...I have so much pride when it comes to her she is one of the greatest human beings I know...She is hard working, compassionate, loyal she has smarts out the ying yang and she is just so darn cute...As you can see she is one of the things that makes my world happy....Ok enough about her the Image I used is HOPEFUL from Whismy Stamps...I coloured her with Copics and three Prisma Pencils..I stamped the image with MEMENTO TUXEDO BLACK...I will list the colours in a bit...Just a reminder to join us over at the challenge blog..the theme is flowers..just click on the link and it will send ya there.. http://onecrazystampercom.blogspot.ca

Hopeful


Copics & Prisma Pencils Used

E0000,000,00,11
E31,33,37
YG61,63,67 (PC 911 Green Olive)
E41,42,43,44 (PC 948 Sepia)
V91,93,95,99 (PC 1076Black Cherry)

Flowers I made with a die and I do not know the name due to the fact that I have them in a special box, the Rhinestones are Kraiser Kraft and the Stickles are Frosted Lace..I hope you enjoyed my card I made this one for an EXTREMELY IMPORTANT PERSON!!! have a great day be safe as well as happy and try to make time to create!!


Wednesday, May 8, 2013

Better Together

Good Wednesday morning!  I hope you are having a wonderful day so far and that it just keeps getting better and better.  On a personal note, last Saturday being National Scrapbook Day, I was able to attend part of the crop that One Crazy Stamper had.  It was a pleasure meeting more of my design team sisters and I hope I will be able to see them again in the future.  Now, back to business....

I needed an anniversary card for this week so I inked up an older image, backed it with a Spellbinders Nestabilities die and added some flowers (which just happens to be our current challenge for the month..click HERE for all the details).


A close up of the stamp:


Copics Used: Birds ~ B21, B23, B24, B26, Y11, Y13, Y15, YR00, YR02; Swing ~ E11, E13, E15; Roses ~ R81, R83, R85, R56; Leaves ~ YG61, YG63, YG67; Heart ~ R22, R24; Sky ~ 0, B000

Thanks for stopping in.  You can now enjoy our blog with Blog Lovin' and Pinterest ~ just follow the prompts in the sidebar.  Enjoy your day!

Hugs,


Tuesday, May 7, 2013

Glitter Rules!!!!!

Welcome to Terrific Tuesday time here at One Crazy Stamper, and this month I get to show you all a great tutorial featuring a variety of items that can be purchased at the online store. When I first saw this tutorial late last year, the original instructions used the Outline Peel-off Stickers from any of the companies that now sell this item, but I wanted to try for the same look using several of the Memory Box dies that I have been collecting. The end result is stunning!!!
So gather your supplies -
Sookwang Scor Tape, Copic Xpress It cardstock, Glitter Ritz in any of the white or clear colors, Cardstock of your choice, Copics, Glitter Magnet, Tweezers, Cuttlebug, Metal Shim plate, paper trimmer, Memory Box dies, Art Institute Dries Clear Adhesive, Microbeads


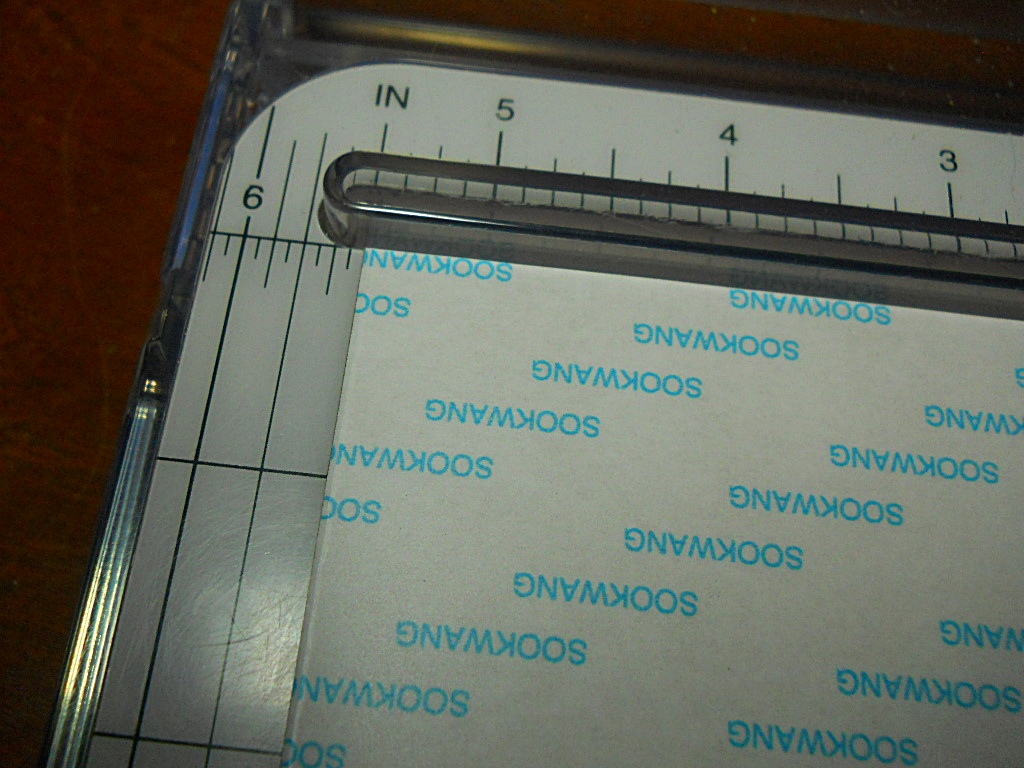
Cut Scor Tape to the finished size of your card front ( 5 1/2" x 5 1/2" )


Cut Copic Xpress It cardstock to the same size as the Scor Tape.
Peel off backing paper from Scor Tape and adhere to the Copic Xpress It cardstock.

Cut your choice of Memory Box dies from cardstock.


Using tweezers carefully place die cuts on the exposed layer of the scor tape - be sure to not touch the surface of the tape as that will effect the adhesion of the glitter to the tape.


Once you have the dies placed on the sticky surface of the scor tape, you can then add the Glitter Ritz.
With your fingers, carefully burnish the glitter onto the card surface, shake off excess ...

... and remove any remaining glitter with the glitter magnet.
Now, for the fun!! Use your Copic markers to color your glittered images.

I have used the following on the Memory Box Wild Sunflower diecuts:
Yellow - Y13, Y15, Y17, Y38
Dark Yellow - YR21, YR23, YR24, YR27
Rusty Red - E07, E19, E18
Leaves - G21, G24, G28
Sky - BG01


Now, if you know me, you will know that I love to add more depth to card fronts, so out came my trusty Art Institute Dries Clear Adhesive and Microbeads to cover the flower centers.

Here's the finished card front in all of it's glittery finery!! The butterflies were done using some of the outline peel off stickers from my stash ( and now I will need to add some of the beautiful Memory Box butterfly dies to my collection ), and the sentiment is an oldie from My Sentiments Exactly!

The finished look of this technique is so different than if you first colored the images and then covered them with glitter - the colors are so much more vibrant!!
 
I hope you have enjoyed this tutorial, and that you want to try this stunning technique for yourself - you will be surprised at how easy this technique is to master!!


Monday, May 6, 2013

Swim Page!


I got a chance to scrapbook a page from my son’s swim lesson pictures. I used some of this gorgeous paper from Simple Stories Summer pack.  I really love this paper pack and will be using it a bunch more!  I kept the page fairly simple but added a cluster of various embellishments that i got from the OCS store!  Here is a close up of the embellishments.

My kids are looking forward to swim lesson’s again this year…it’s almost summer! yay!  Thanks for stopping by and taking a look!
Supplies: Bazzill paper, Simple stories paper, buttons, brads, TH tiny attacher, sewing machine, TH spinners